Imagine if the directors of “Captain America: The Winter Soldier” showed a glimpse of Bucky’s survival from the train wreck before his introduction as The Winter Soldier. Wouldn’t the best of us have guessed that Bucky was The Winter Soldier? That would have been a serious flaw in the plot come to think of it.
But there wasn’t such a mistake in the movie, which translated into suspense. Your blog outline is pretty similar to this. Every move and scene from a movie is mapped in advance, structured, and then filmed as per the plot.
A blog outline does the same heavy-lifting for you. You dump your ideas on a paper, organize them into an outline, and then start writing. In this way, your content is better prepared, well though-out, and interesting to read as well.
Why do you need a blog outline anyway?
Without an outline, your content flows without direction. You start from point A, move to point C, and get back to point A while missing point B altogether. Ultimately, you end up with a Frankenstein post, which has been cut and stitched up to make a complete write-up.

Such a Frankenstein post never makes for a good reading experience. It delivers your thoughts, but it doesn’t capture their flow. Since telepathy isn’t an option to transfer your thoughts to your readers, you’ll have to do with an outline.
A blog outline gives your thoughts an anchor, holding the central ideas steady for readers to understand. So if you’re wondering, how to write a successful blog or how to write a blog post fast the answer lies in writing an outline first.
Here’s a brief walk through the major merits of a blog post outline:
From your perspective:
- An outline structures your thoughts. When you’re writing, you’re not singing a karaoke. Instead, you’re giving a full pre-practiced on-stage performance with the lights shining on you. So you need an outline to glue your content in an organized manner that flows smoothly.
- A blog outline saves the time you spend on the writing and editing stages. You don’t have to waste your time figuring out what and how to write and then heavily edit the piece to breathe some sense into it. Instead, an outline gives you the bare-bones structure of the blog post, and you have to fill in the flesh for a healthy, nourishing write-up.
From the readers’ POV:
- An outline holds your ideas in an easy to understand structure where one idea smoothly jumps into another. This smooth connectivity between thoughts improves your content’s readability.
Related resource: How to make your content easy to read?
- A smooth flow and better structure are going to deliver solid takeaways to your readers. This means your content has greater value to offer.
Starting with an outline: two action plans to pick from
Writing a blog outline isn’t as tedious a task as writing an outline for your essay. Anything that makes sense to you can make a good outline, provided you take it seriously, and carefully draft it.
At this point, you’ve two paths to choose from:
Action Plan I: The big bang theory of creating an outline
The big bang theory suggests the universe was made when matter expanded and stretched to the universe that we have today.

When writing a blog post outline, you can follow suit – pick on one idea and expand it. For example, your central idea is to cover a blog post on “blogging for business.” Now, expand it with possible musings on what it will cover.
Blogging for business could cover:
- Why your business needs a blog?
- How can a blog help your business grow?
- Statistics that prove blogging is big in the business sphere
- What topics should you cover on your business blog?
Action Plan II: Prepare an ice cube outline
An ice cube outline, as I call it, focuses more on compressing available data than expanding an idea. For instance, you may want to promote an eBook by writing a blog post that discusses some of its key takeaways and then push people to read the book.
Both of these outline writing plans differ in two ways:
- Your content’s purpose
- The research required
If you plan on writing from scratch, the big bang theory of creating an outline works because you’re to explore and expand your idea. On the flip side, if your content’s target is repurposing or taking available data and shaping it into a post, then the ice cube method of creating an outline works best.
Similarly, when you are stretching an idea, you need to fill in the details. Odds are you may not be clear about something related to your idea. This will require in-depth research with your goggles and lab coat on.

On the other hand, repurposing content means that you already have the raw material so you may only need to do light research work and make notes on what similar content covers.

How to write an outline: Let’s roll already!
Here’s a simple break down of the process:
Step 1: Write down the central point idea
Start with jotting down the main point. For example, at the heart of this post is – how to write a blog outline? The goal isn’t why an outline is important, but how to go about preparing it for structuring your thoughts and writing with clarity.
It’s possible that you may have gotten the central idea from your keyword research or when you were reading something.
Step 2: Draft a headline
Next, you need a headline that sums the central idea for the readers. Of course, writing an attention-grabbing headline is not a child’s play. So you’ll need to write it over and over until you come up with something that will do. You can do this now or later when the post ends.
Resource: How to write truly great headlines
For now, the point is to have a starting point to reach the finish point. Here are two options that served as my starting point for this post:
How to write a blog outline for creating epic content for your readers?
Or
Here’s how to write an epic blog outline in X super easy/ridiculously simple steps
Step 3: Prepare an idea map
Dump all that you have in your mind around this topic. Note down all the points that you think your blog post should cover. All the takeaways also go here.
Brain dumping allows you to put all your thoughts quickly on paper, so you don’t miss a point and try to insert it later on in your blog post.
Step 4: Set up an estimated word count
By now you’ve a clear idea of what your post will include – thanks to the mind map. Estimate how many words these ideas will require. It’s best to set up a benchmark. You don’t want to drag your ideas when they can be conveyed without fluff.
Also, you don’t want to be too quick about it and write it all without sufficient explanation. Therefore, a rough word count is essential. So, for a post on informative blog post outline, 1500-1800 would do. However, a post on creating content would require minimum 2,500 words.
Step 5: Dig into the anatomy of your blog post
Behind every successful write-up is knowledge of your audience. If you know your readers, you can easily tailor your content to their likability. It’s how Netflix knows which shows you’ll like the best.
Therefore, at this point, you’ll need to write down who your post will go to. Answer the following questions:
- Who is your audience and how much will your topic appeal to them?
- What are the possible questions your audience may have related to the topic?
- What tone of voice should you use to talk to your readers, for example, personal, authoritative, informative, and so on?
At the same time, decide the structure. Will your post be a listicle? An instructional or how-to piece that goes into the nitty gritty of the process? Will you interview someone for the post or write a roundup post?
Step 6: Get your hands dirty with the research work
Researching your topic branches out into two main aspects:
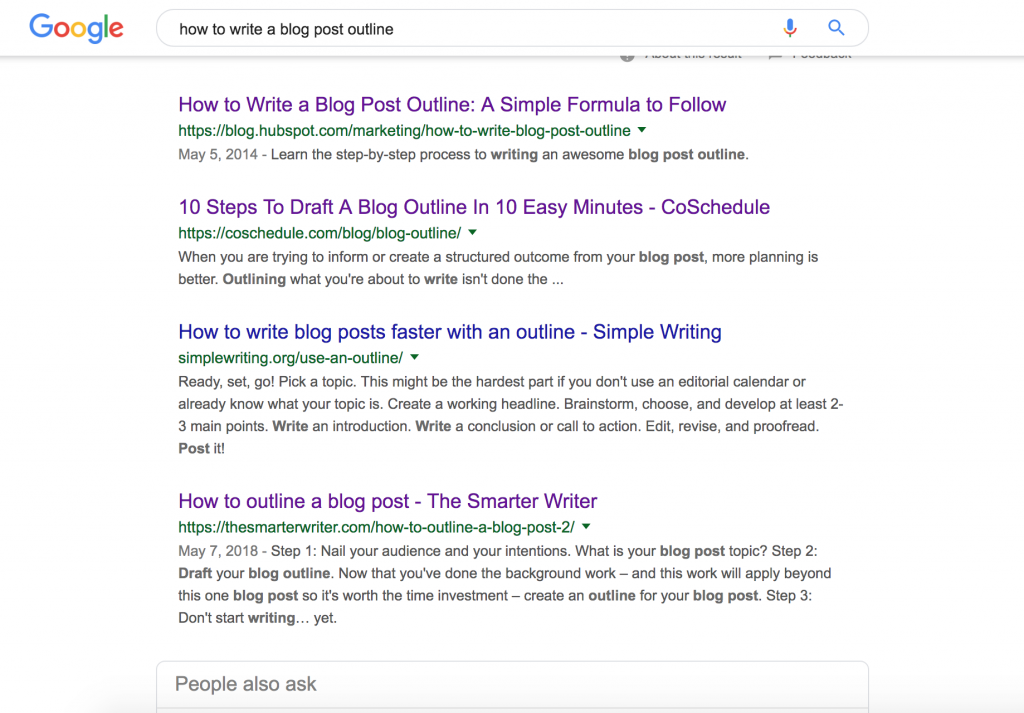
1. Survey what’s already available on the topic to find gaps
This gives you an idea of what’s missing and what’s already covered. It’s a good way for identifying what you’ll cover in your blog post and how you’ll add your twist to it.
Here’s what I got for this topic:
2. Look for answers to any questions you may not be clear about
For any comprehensive topic that you cover, there are odds that you may have some questions yourself. Or you may want to revise something before talking about it in your blog post.
Top Tip: Save the links to all helpful resources so that you can link them in your piece or revisit them if something slips from your mind.
Step 7: Dig into relevant research and gather data to include in the post
A crucial ingredient that makes a blog post valuable is research. Bravo if you have original research with you. 👏If not, you need to dig into more relevant data so that your final content piece is backed with the latest findings on the topic.
Notice how this piece by Zapier weaves in relevant studies for supporting the claims made in its content:

Top Tip: Gather any relevant supportive charts that you come across. You don’t have to use all of them, but you can add the most interesting ones.
Step 8: Prepare a structural framework
By now, you know what your key idea and takeaways are, have a starting point (a headline), how your blog post will be structured, who it will address and in which voice. You also have an idea of what’s already available on the topic out there.
Let’s head to the actual writing a blog post outline part. Your starting point here is the traditional pattern for writing outlines as you were taught in school (Relax! it’s not going to be that bad).
The major pillars you have are:
- An introduction
- Your blog post’s body
- Conclusion
Next, fill in the details. What will your intro cover? Ask yourself how will you start it and what attention-capturing points you’d want it to have. So we have:
Introduction:
- The starting pointer
- Idea 1 to discuss
- Idea 2 to discuss
It’s also best to share what your post will cover in the introduction.
Then add the specifics that will go into your blog post. Use heading tags and subheadings for elaborating each point.
These were the three sections for this post:
- Why do we need an outline
- Two action plans for writing an outline
- Writing an outline – the steps
Each of these were further divided, for instance, the first section was divided into the benefits of writing an outline from a writer’s and a reader’s perspective.
Lastly, you’ve the conclusion. You can either include a recap of the main takeaways or discuss something that leaves people with more food for thought. Get as creative as you can.
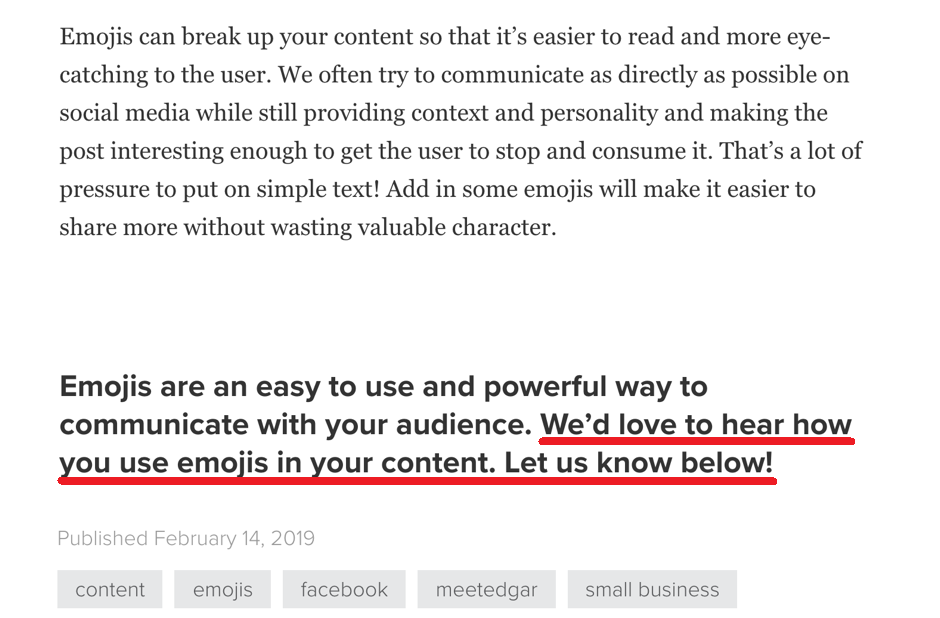
Don’t forget the call to action (CTA). This is the part where you share what you want your readers to do. In my case, it’s asking if you’d want any help with writing your content.
Here’s another example from MeetEdgar’s post on how to use emojis in your marketing:
Step 9: Step back and watch your work
Of course, the outline that emerges from all this work won’t be perfect in one go. Read it from top to bottom and check if the structure makes sense. You may need to arrange sections or move points around. Edit as needed.
Step 10: Start writing your draft
Once you have the blueprint for your blog ready, start writing your draft. If writing isn’t your cup of tea or there’s a lot on your plate, work with a writer. Share your outline with the writer so that he/she can put flesh to the bones.
Three writing tips to help you here are:
- Write in simple language minus the industry jargon. You’re not writing for yourself but your audience so don’t use technical terms that they won’t understand
- Write short sentences. Long sentences make things complex, which is a no-no for digital content
- Once done, step into your readers’ shoes and read your post from their perspective to see what’s missing
Related: Eliminating fluff from your writing
Conclusion
Having an outline for your blog post can help save a lot of your time. You’ll find that you’re not stopping mid-typing, wondering what should come next or if what you’re writing even makes sense. Remember an outline isn’t restrictive. As Karen Hertzberg writes in this post for Grammarly, “An outline isn’t a prison—it’s there to guide you, not control you.”blog